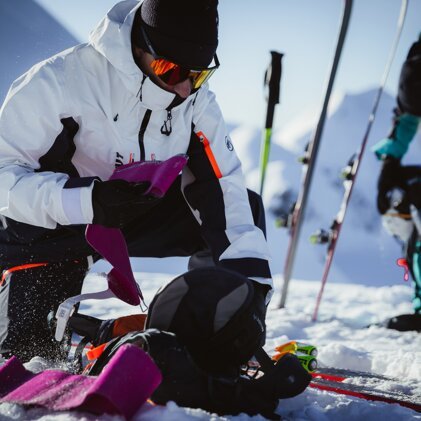
Maintaining your ski skins is the basis of every successful ski tour. Clean, dry and well-prepared climbing skins ensure reliable grip, better gliding properties and relaxed handling on every tour.
You should therefore not only know the basics of ski touring, but also be familiar with taking care of your equipment. A few simple routines will make it easier for you to look after your ski skins and significantly extend their lifespan.
Find out everything you need to know about your climbing skins in this article:
- Care
- Cleaning
- How to dry them properly
- Correct storage and
- for optimal protection on the go
All-round service: At one of over 800 INTERSPORT Rent locations worldwide, you can not only rent top-maintained touring skis and suitable accessories. Our RENTertainers will also be happy to give you tips on how to care for your ski skins.
Why is the correct care of ski skins so important?
Well-maintained climbing skins work longer, adhere more reliably and maintain better gliding properties, regardless of whether you are travelling in powder, in spring firn or on hard frozen passages.
Unkempt skins, on the other hand
- clog faster (form snow clumps more quickly)
- pick up dirt more easily
- lose grip
- fray
- at some point hardly stick at all
With consistent care, you not only save yourself frustration on the mountain, but also expenses for expensive new ones.
Ski skin care during the tour: How do I do it right?
Dry, clean and warm: that's the golden formula for a long "skin life".
Because you decide how well your skins work and how long they last during the tour.
Keep dry: Moisture is the biggest enemy
Moisture makes the skins heavy, reduces grip and causes the snow to form lumps. Mohair skins in particular, which glide extremely well, are sensitive to heavily soaked snow.
What you can do:
- Avoid crossing over very wet snow if possible.
- In wet snow, regularly wipe off water with a ski edge or scraper.
- Pay particular attention to moisture build-up on passages with very wet snow.
What do you do if your climbing skins get really wet?
Then you can simply wipe them off with your hand from the tips down along the edge of the ski. This allows you to remove most of the moisture without any tools.
Keep it clean: Why the choice of route is crucial for skin care
Staying on track saves your skin a lot of trouble. Shortcuts through the forest may be tempting, but they are also dangerous for the material:
- Needles get stuck in the fur.
- Resin sticks stubbornly to the skins.
- Stones and gravel damage the fibres.
- Dirt from thin snow passages impair the sliding properties.
The better you look after your skins, the longer they will remain in top condition.
Keep warm: Be good to your skins on the descent!
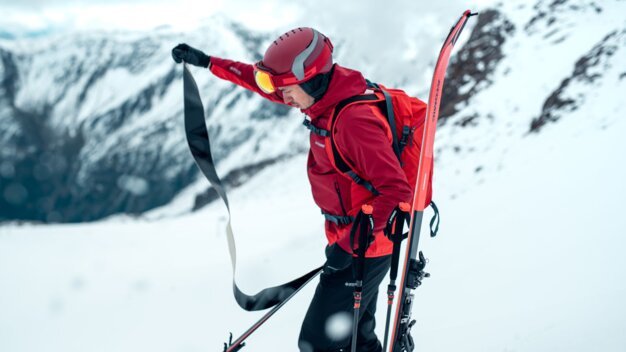
If you wear your skins under your jacket during the descent, the glue will stay warm and reactive. To do this, simply fold them in half with the adhesive side facing inwards. This makes the ski skins easier to put on later and ensures they adhere more cleanly, making them less susceptible to absorbing dust or moisture.
How do I care for and clean ski skins after the tour?
The actual care begins after the ski tour. Many people underestimate this: The first few hours after the tour are crucial to how well your skins survive the next season.
Moisture, dirt and adhesive residue can accumulate. Properly caring for climbing skins after the tour will massively extend their lifespan and save you expensive new purchases.
How do I dry ski skins properly?
Care for ski skins also means drying them properly. However, you should bear this in mind:
Moisture + heat = damaged skins and ruined glue.
Many people make the mistake of trying to dry their skins too quickly - but this can destroy them. Direct heat damages both the sensitive fur and the adhesive. That's why you should never …
- place them directly on the radiator.
- dry them in the sun.
- Hang them up in a steamy bathroom.
- spread out on the hotel carpet.
Patience is the key to success here. It's best to hang your skins on a coat hanger - this allows them to dry evenly and in an airy place without damaging the adhesive.
Hang the skins correctly to dry:
- In a clean place
- At room temperature
- Glue side open
- Adhesive side protected from dust
How do you clean ski skins without damaging them?
You should always look after your climbing skins and protect them from dirt as much as possible. If your route was not perfectly clean, you can clean them as soon as they are dry:
- Carefully remove needles, small stones and resin residue with tweezers.
- Wipe the skin with a slightly damp cloth.
- Treat stubborn areas with a special skin cleaner.
- If necessary, allow to dry again afterwards.
Most manufacturers also offer special care products and cleaning sets for their furs.
What do I do with frayed edges?
Simply cut off any loose fibres with fine scissors or nail clippers. It is then advisable to seal the material with a lighter. But be careful: only use a small flame and do not damage the adhesive side!
When is fur wax and waterproofing worthwhile?
Coat wax and waterproofing are not mandatory, but they are real game changers in demanding conditions. Especially if you are often out and about in changeable weather or wet snow, the care products pay off:
- Coat wax reduces water absorption and minimises the risk of sticky snow on the skin, especially in changing or wet snow conditions.
- Waterproofing sprays improve the water-repellent properties of the fur.
However, you should only use products that are suitable for your coat type. It is best to follow the manufacturer's instructions.
How do you store your ski touring skins correctly?
The following applies for the summer break: caring for ski skins also means storing them correctly. Ideally, you should use the protective foil that comes with the skins. Once you have applied them, the skins can be stored in the skin bag - ideally in a cool, dark place that is not too dry but also not too damp.
What should I do if the glue on my ski skins no longer holds well?
The glue for ski skins is the area where many people first realise that their equipment is showing some signs of wear. Fortunately, some things can be repaired before you have to think about a complete replacement.
How do you recognise problems with the skin adhesive?
The glue is often the first thing to fail, even before the skin itself is worn out. Fortunately, there are clear warning signs that show you when action is needed.
Look out for these signs:
- The skins come loose at the tip or end when climbing.
- Snow works its way under the adhesive surface.
- The glue looks greasy or contaminated.
- Glue residue sticks to the ski.
Then it's time to take care of the glue on your skins.
How can you improve the adhesion again?
Sometimes it is enough to keep the skins warm and remove loose dirt. However, if the glue is really worn-out, only professional treatment will help:
- Have the adhesive renewed (re-coating) at a specialist dealer's service centre.
- Have the ski base thoroughly cleaned before putting on new or renewed skins.
- Avoid experimenting with aggressive solvents yourself.
It is better to leave the subject of "removing skin glue from skis" to the professionals. This way, the base remains undamaged, and adhesion is guaranteed in the future. Contact selected INTERSPORT Rent centres for this - your touring skis and skins will be professionally serviced there.
What are the typical problems with ski skins and how do you solve them?
Almost everyone who loves climbing snowy mountains on two skis knows a few classics. If you want to look after your ski skins properly, you should be aware of these typical problems:
Sticky snow on the skin during the ascent
Cause: Moisture or temperature changes
Solution: Wipe off moisture, keep skins warm, use the manufacturer's anti-stud agent
Poor adhesion
Cause: Cold adhesive, dirt or overaged adhesive
Solution: Warm the skins, clean the adhesive surface, have the base cleaned, have the glue renewed.
Dirty skin
Cause: Resin, needles or stones in the fur
Solution: Allow to dry, remove particles with tweezers, use manufacturer's cleaner.
As you can see, there are a few things you can do to keep your ski touring equipment as good as new for a long time and deliver the best performance. However, to get the most out of your gear, you should also master the right ski touring technique. We wish you lots of fun on your next ski tour!
Frequently asked questions about the right care for ski skins
How often should I clean ski skins?
You should always clean ski skins if you have visible dirt, needles or tree resin in the fur. This is particularly common after spring tours or forest tours. The sooner you clean your skins afterwards, the less dirt can accumulate.
How do I prevent snow sticking on my climbing skins?
You can prevent this by keeping skins as dry as possible, regularly wiping off moisture and using suitable skin wax or anti-stud products in critical conditions.
What do I do if the glue on my skins is barely holding?
If heat and cleaning no longer help, it's time to have the adhesive renewed at the INTERSPORT Rent shop. A re-coating will restore many skins for several seasons.
How do I store my ski skins over the summer?
The best way to store your climbing skins is with a protective foil and the net supplied by the manufacturer. They should be stored in a cool, dry place out of direct sunlight. Please do not store your skins in the boiler room or in the cellar if it is damp or if there are significant temperature fluctuations.
How can I tell when it's time for new skins?
You should replace your climbing skins when the fur is clearly worn, the adhesive remains weak even after renewal or the material becomes cracked and uneven. Then it makes sense to invest in new skins.
INTERSPORT Rent tip
The RENTertainer recommends
Don't fancy maintaining ski skins? No problem, at one of over 800 INTERSPORT Rent locations worldwide, you can rent top-maintained, up-to-date touring skis and all the equipment you need, from helmet to ski boots. Our RENTertainers will also be happy to give you useful tips on how to care for your touring skins.
And if you still need some inspiration for your next tour ... Read our article about the most beautiful ski touring areas in Austria, Switzerland and France!
Related articles
You may also be interested in:
